 Order Entry Properties
|
|
Order Entry PropertiesThe Order Entry Properties dialog can be opened from the Order Entry Toolbar by pressing the  Order Entry Properties button or the F5 button on your keyboard.
In this dialog you can find 11 different tabs/sections, where you can customize your Order Entry-specific settings:
|
Live Trading
Paper Trading Look Order Type Order Quantity Accounts Actions & Properties Contingent Orders Alerts Cross Warnings Order Preview |
|
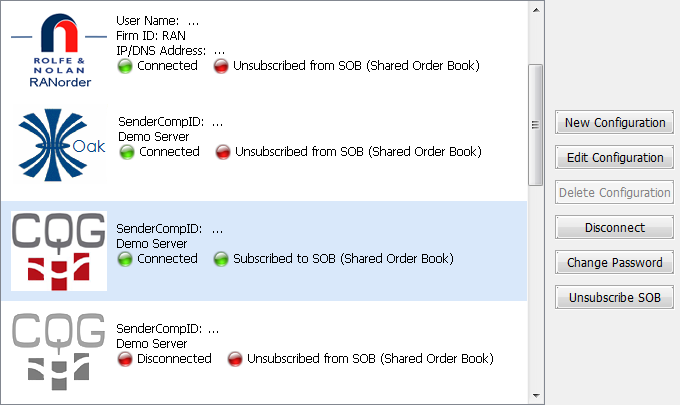
At the left side under the Live Trading tab you can see all your saved Order Entry configurations (connections). You can add, remove or edit your Order Entry connections by using the buttons from the right side of the dialog. Note that the parameters that are required to connect to an Order Entry server may differ from provider to provider (of interest when you add or edit a connection). In order to connect to an Order Entry server, you should select a previously created Order Entry configuration from the left list and press the Connect button at the right side. In the image above, the user is already connected to the selected Order Entry server, so he could only Disconnect. By using the Change Password button, you can change your password for CQG on the server side. This feature can be used only when you are connected to CQG. As a recent modification, the Shared Order Book settings were moved from a previous location (separate Order Entry Properties tab), here in the Live Trading tab. In order to read more about this change, please click here. |
|
|
You also have three options what are related to your Live Trading settings: Default to Entire Book view in Live Trading - If you check this option, when you connect to a live Order Entry server, the default account which will be loaded in the Account Bar will be the Entire Book. Default Account Number for Order Entry in Account View - When placing an order, the Order Preview dialog (assuming this dialog is enabled to be shown from the Actions & Properties tab) will default either to the simple Account already selected in your Account Bar, or to Blank, depending on your selection made here. Default Account Number for Order Entry in Group View – Analog to the setting above, but used when you selected a group in the Account Bar. It is important to mention that this setting will be enabled only when you uncheck the Place Group Orders when in Group View option from the Actions & Properties tab. You can choose from 3 possibilities: Blank - will leave the Account Number field empty in the Order Preview dialog; First - will use the first account from the group and, finally, User-defined will take the account specified in the field below that you can manually edit. Special note: the last setting is also employed when the Order Preview dialog is not enabled. If you selected Enter the order immediately for the When Placing an Order option in the Actions & Properties tab, the order will be automatically placed for the account you set here. |

|

|
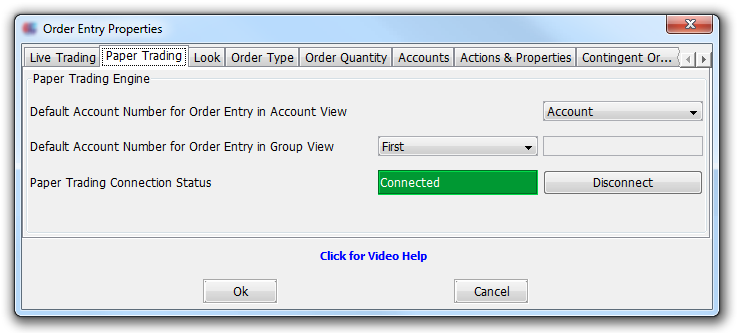
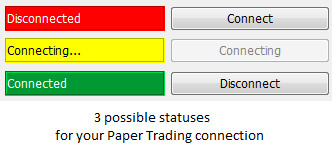
Paper Trading is a simulated trading process in which would-be investors can practice investing without committing real money. In this section you may configure the behavior of the Paper Trading Engine. The Default Account Number for Order Entry in Account View and Default Account Number for Order Entry in Group View are exactly the same settings we presented in the Live Trading tab, but they are used for the Paper Trading Engine. The last option indicates the status of your Paper Trading connection and it can be Connected, Connecting... or Disconnected. You can use the Connect button, when you need to connect to the Paper Trading server or the Disconnect button, in order to do the opposite operation. |
|
|
If an Order Entry account has not been loaded yet, this will be visible in your Account Bar and the Background color for it (by default) will be grey. You can change this background color from here. |

|
|
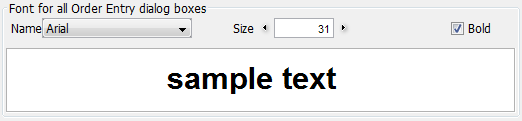
In this section you may customize the formatting of the text that appears in all the Order Entry dialogs. The formatting parameters that you can modify are: Name - Choose the font family from this list. Size - Select the font size. Bold - Check this if you need bolded text. In this section you also will notice a sample text that 'demoes' all the modifications to the font. This way you can preview the font that will be used in the Order Entry dialogs. |
|
|
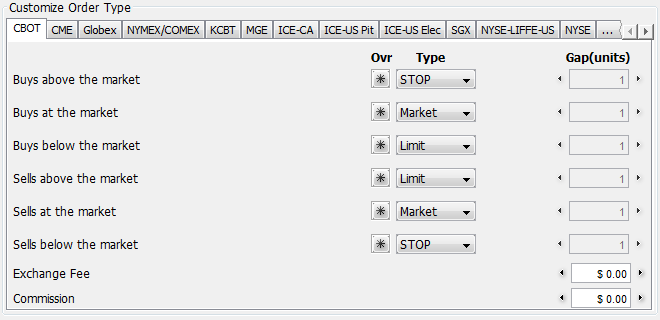
You can set different order Types for different price levels (above the market, at the market, below the market) and sides (Buys or Sells). These settings are customizable independently for each exchange and for each session.
The * buttons will open a dialog from where you can override the order type at contract level. |
|
|
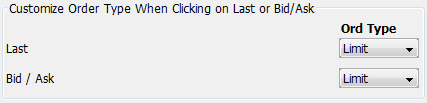
You can select the default Order Type which will be used when placing an order by clicking on these price fields. You can choose between Market or Limit order for Last and you can select Limit only for Bid/Ask fields. |
|
|
This option will define which session of a contract (Pit-traded or Electronic) will be used when placing an order for the Composite session of a contract. |

|
|
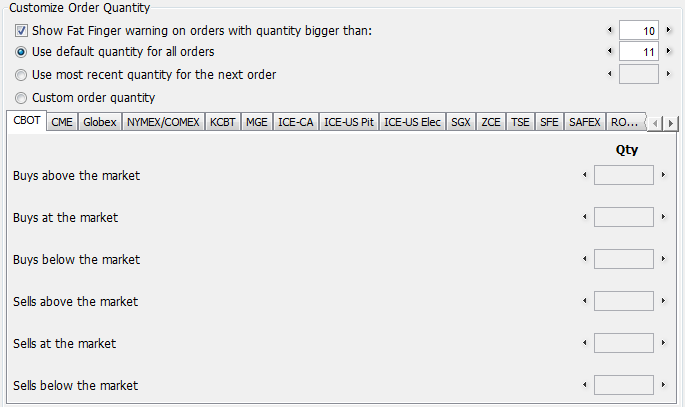
Here you can set default values for quantity parameters that are involved in entering orders. Select the Show Fat Finger warning on orders with quantity bigger than option and the application will display a warning when you attempt to enter orders with a bigger quantity than instructed here. This option will prevent unpleasant situations arising from mistyping, when the effect is a huge number set as quantity. You can select one of the following behaviors: Use default quantity for all orders or Use most recent quantity for the next order. Use default quantity for all orders will employ the same user-specified quantity for all orders. The same value can also be changed directly from the Order Entry Toolbar. Use most recent quantity for the next order allows you to specify a quantity to start with; this is the default quantity set to be used when placing the first order. However, if the user overrides this quantity before placing the order (e.g. from the Order Preview dialog), the next order will use this last quantity. You can also use Custom order quantity in order to choose distinct behaviors for each exchange. In this last case, you may specify the quantity for: Buys/Sells above the market, Buys/Sells at the market and Buys/Sells below the market. |
|
|
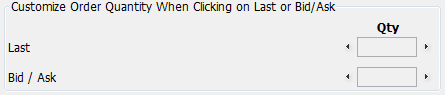
Use these options to customize the quantity that will be used when placing an order by clicking on a Last or on Bid/Ask cell, respectively. |
|
|
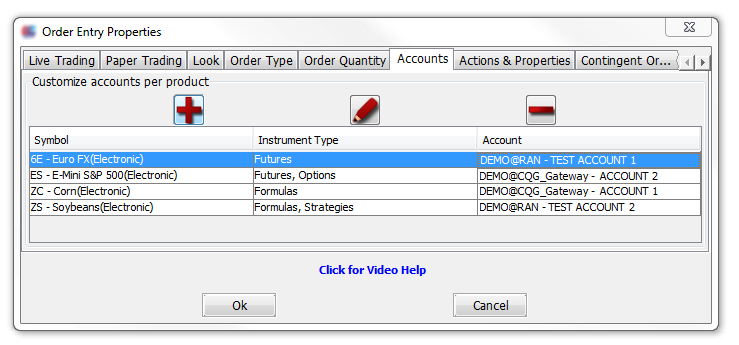
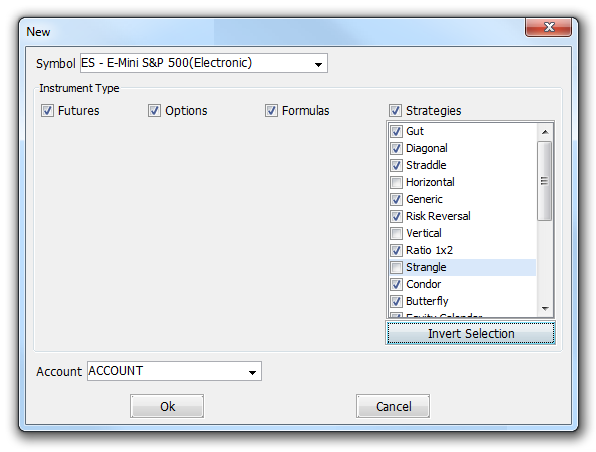
From this tab, you can choose the accounts that will be used to place order for specific symbols and instrument types. Rules for each account-symbol-instrument type combination can be created, edited and removed by using the following buttons:
An example for creating a rule: first, you should choose the Symbol by selecting it from the combo box or by typing, for example ES for E-Mini S&P 500 (Electronic). Next, you can choose all or just some of the following Instrument Types: Futures (e.g. 6EZ13); Options (e.g. 6EZ13C11200); Formulas (e.g. 6EZ13 - 6EM14); Strategies (e.g. 6EM18:H18[FX] or 6EH14C13000:13500[VT]). You can also select from a list of different strategy types, such as Gut, Diagonal, Straddle, Butterfly, etc... before saving the rule. The last item is the Account that will be used for placing the order for the previously selected symbol and instrument type combination. It is important to mention that you need to be connected to Order Entry, in order to have this list populated with accounts. If you select all the instrument types for a symbol, when you place an order for the respective symbol, the account nominated by the list will be used. If you selected just some of the instrument types, when placing an order for one of the unselected types, the application will use the default account (the one selected in the Account Bar). |
|
|
The Start in option will specify the Order Entry mode that will be used at login. In order to read about the differences between Live Trading and Paper Trading mode, please click here. If you opt to use the Previous Setting, the application will start in the last mode active before logout. Check the Automatically Reconnect Broken Connections option, if you want to reconnect to Order Entry following eventual disconnects. |

|
|
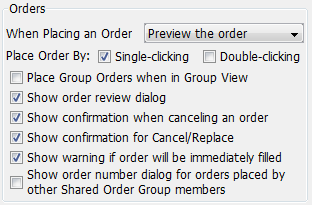
This section allows you to customize the application's behavior regarding order placing. You can choose from three different behaviors When Placing an Order. Your options are the following: Enter the order immediately (will interact with the Show order review dialog option detailed a few paragraphs below), Preview the order or Show the Order Ticket. In order to read more about these, please check the Order Preview and Order Ticket sections of this Help document. As we mentioned in the Order Entry section, you can place an order from any module where you have Last / Bid / Ask info; a left-click will place a Buy order and a right-click a Sell order. The Place Order By: option allows you to place an order by Single-clicking or Double-clicking. Check the Place Group Orders when in Group View option, if you want to place group orders after selecting a group account in the Account Bar. The group accounts can be defined on the Order Entry provider's side or on the user's side by pressing the |
|
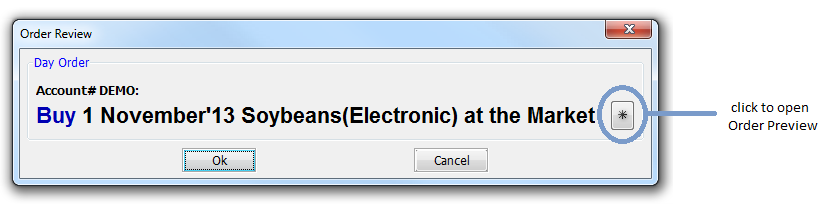
If the Show order review dialog option is checked, the application will show an Order Review dialog (take a look at the image below) before the place order action and by pressing the * button you can go back to Order Preview and change your order if necessary. If checked, the Order Review dialog will be shown even when Enter the order immediately (mentioned above) is enabled. (In order to have the order placed instantly, one would need to have Enter the order immediately selected and Show order review dialog unchecked.)
|
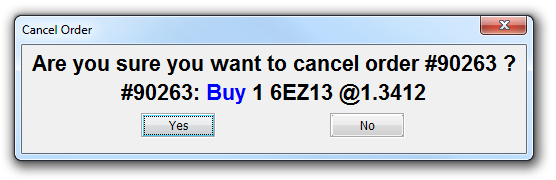
By checking / unchecking the following options you will enable / disable some warning and confirmation dialogs which can be useful in the context of the place or cancel / replace action: Show confirmation when canceling an order, Show confirmation for Cancel/Replace and Show warning if order will be immediately filled (e.g.: placing a sell order below market price). You can see an example for the cancel order confirmation in the image below. If the Show confirmation when canceling an order option is uncheked, the cancel order action will be executed immediately.
|
The last, Show order number dialog for orders placed by other Shared Order Group members option should be checked if you want to be notified in a separate dialog, when somebody else from your Shared Order Group placed an order. In order to read more about the Shared Order Book functionality, please click here.
|
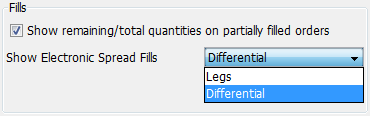
In this section, you can specify two different options that will change the way you can see your fills in the Orders & Positions Monitor screen. Show remaining/total quantities on partially filled orders will toggle whether, for partially filled orders, we show a text (e.g. in the Quantity column of an Orders & Positions Monitor) formatted as "filled quantity / total quantity", or the filled quantity, solely. For the second, Show Electronic Spread Fills: you can display the fills as Differential (per-strategy) and Legs (per each leg). |
|
|
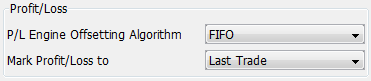
You need to check this section, in order to change the Profit/Loss options of the application. You can select from three possibilities for the P/L Engine Offsetting Algorithm: FIFO Intraday First, FIFO (First-In First-Out) or LIFO (Last-In First-Out). You can Mark Profit/Loss to Last Trade or Bid/Ask. |
|
|
By checking / unchecking the Show account groups including Entire Book and Sales Codes option you will show / remove all the group accounts from the Account Bar. As mentioned in the description, if you uncheck it, you will also remove the Order Entry provider-side defined groups too. In order to read more about Account Groups, please click here. |

|
|
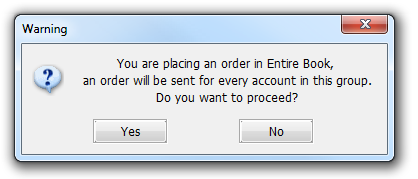
If you select the second option: Show warning message when performing an order entry function on a default or custom group of accounts you will get the warning from the right before placing an order for the Entire Book group: |
|
Check the Display icon to indicate shared accounts option and if you are subscribed with an account to Shared Order Book, you will see the  Shared Order Book icon below your Order Entry account in the Account Bar. In order to read more about Shared Order Book, please click here.
The last option from this section will determine if the Updating of Purchasing Power & Total Account Margin Requirements will be Static or Dynamic.
|
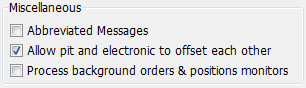
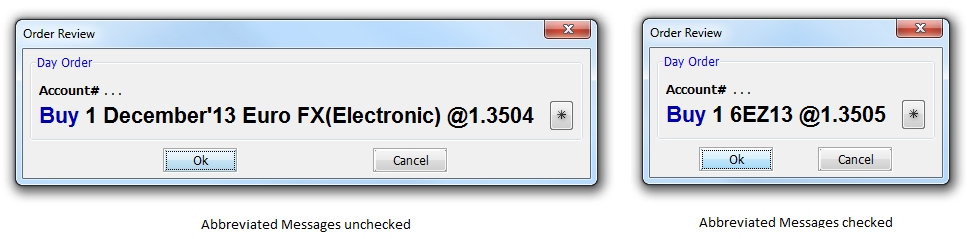
If you check the Abbreviated Messages option, all your Order Entry messages (for example in Order Review or Order Activity Log) will be shorter. Please take a look at the image below. |
|
|
Allow pit and electronic to offset each other - Check this option and your fills and positions from the same underlying contract will be offsetted together, regardless whether your fills and positions are on the Pit-traded or the Electronic session of the contract. As a convention, the resulted net position will be listed in your Orders & Positions Monitor under the Composite session of the contract.
When the Process background orders & positions monitors option is checked, all your Orders & Positions Monitor screens will be automatically updated, even if they are not visible on your screen. If you uncheck this option, the frame will be refreshed only when you click on it and thus render it visible. This optimization makes more juicious use of your system's resources.
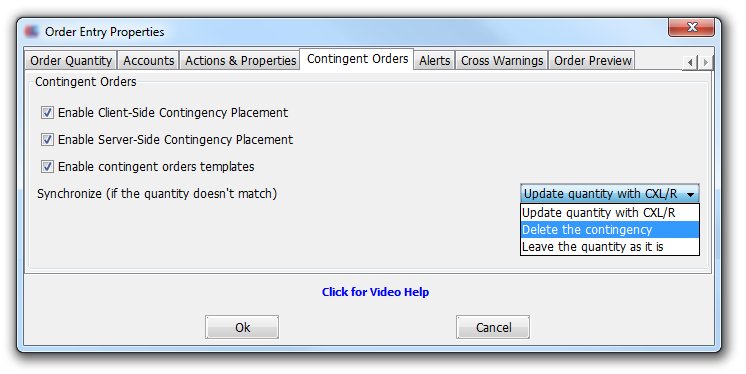
In this tab you can change settings which are related to your Contingent Orders. In order to read more about contingencies, please click here.
If you read the detailed presentation above, you learned that the application offers you access to two types of contingencies: client-side and server-side. The difference between these is that the server-side contingent order will be executed even if you close the application, while the client-side is working just when the platform is running. By checking/unchecking the following options, you can enable or disable these contingencies: Enable Client-Side Contingency Placement and Enable Server-Side Contingency Placement.
You can also use templates for your contingent orders, if you enable the Enable contingent orders templates option in this dialog. Please take a look at the following sections of this Help document, in order to read more about these: Contingency Templates Toolbar and Contingency Templates.
The Synchronize (if the quantity doesn't match) option chooses the desired behavior if the quantity doesn't match. The value for this item can be one of the following: Update quantity with CXL/R, Delete the contingency or Leave the quantity as it is.
|
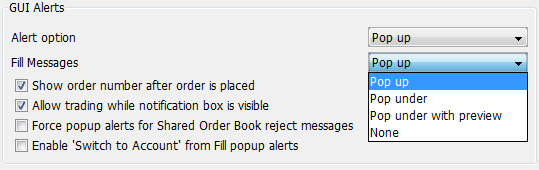
In the GUI Alerts section you can change the way you will be notified in different cases, for example when you place an order, get rejected (Alert option) or get a fill (Fill Messages). You can choose from four different possibilities: Pop up, Pop under, Pop under with preview and None. When you choose None you will not get notification messages at all. If you select Pop up, each message will appear in a pop-up dialog. |
|
|
Use the Pop under option, if you don't want to be disturbed by the pop-up dialogs. If you select this option, when you get an alert, an icon will appear in your Status Bar. |

|
|
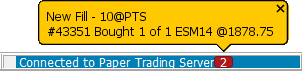
The Pop under with preview option is similar to the previous Pop under one, but when you get an alert you will also see a short bubble message above the notification icon. |
 |
|
You can check these notification messages in two ways:
|

|
Show order number after order is placed - If this option is checked, after you place an order you will get a confirmation dialog with the new order's number.
Allow trading while notification box is visible - If you uncheck this option, you cannot trade until you close the alert dialog. By leaving this option checked, you can ignore the notification dialog box and place orders without closing it.
Force popup alerts for Shared Order Book reject messages - By selecting this option you will get all the reject messages (in a popup dialog) from your Shared Order Book accounts even if you disabled the alerts. In order to read more about the Shared Order Book functionality, please click here.
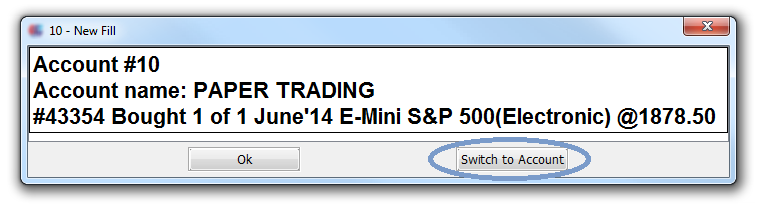
Enable 'Switch to Account' from Fill popup alerts - By selecting this option you will have a Switch to Account button in your fill notification dialog. This can be useful if you are using multiple accounts for trading. If you have Account A selected and get a fill notification for Account B, you will be able to switch to the account that got an order filled directly by pressing this button. It is important to mention that this is available only if you select Pop up for your Fill Messages option.
|
|
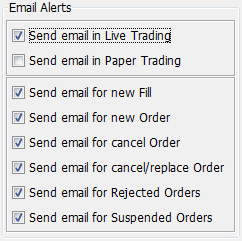
In this section you can set up the Order Entry system to send you notification e-mails for both Live Trading and Paper Trading modes by checking the Send email in Live Trading and/or the Send email in Paper Trading options. In order to read more about the difference between these two modes, please click here. You may also choose from a list of actions for which you need to receive notification e-mails: for new Fill, new Order, cancel Order, cancel/replace Order, Rejected Orders or Suspended Orders. |
|
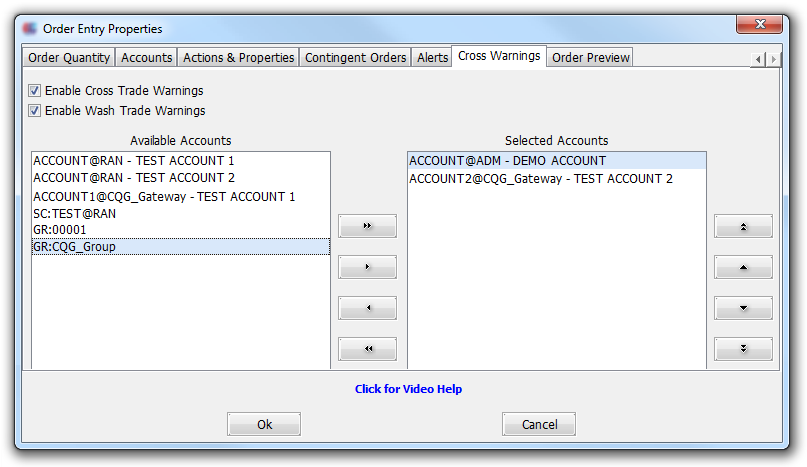
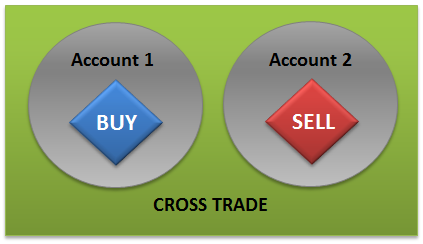
In this tab, you can enable cross and wash trade warnings for the accounts from the Selected Accounts list. These warning dialogs will appear when you try to execute both a buy and a sell for the same contract.
A cross trade is when a broker has a buy order from one customer and a sell order from another customer. The broker needs to expose one order to the market for a specific period of time prior to placing the next order. When you check the Enable Cross Trade Warnings option, you will be alerted when you are trying to make a cross trade.
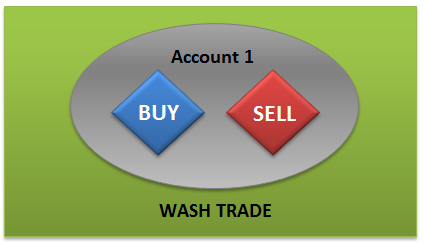
A wash trade is when you are the underlying beneficiary of both the buy and sell (you're trading with yourself). If you want to be notified when you are trying to make a wash trade, you just need to check the Enable Wash Trade Warnings option.
|
You need to move the accounts you want to get warnings for, from the Available Accounts column to Selected Accounts. In order to do that, please use the following buttons:  for adding all the accounts,
  add the selected account,
  remove the selected account and
  remove all the accounts. You can also change the order of the accounts by using the
  , ,
, ,  and
and  buttons from the right side of the dialog.
As a new feature, we also added support for cross warnings for group accounts (both user-defined account groups and groups defined on the Order Entry provider side). In order to read more about Account Groups, please click here.
|
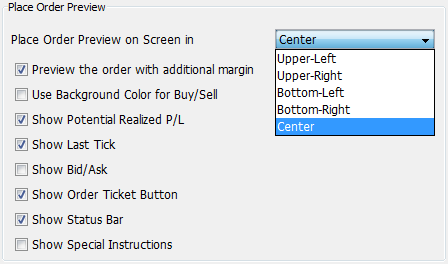
By making changes in the Place Order Preview section of this tab, you can customize the look of the Order Preview window that appears when you place an order. It is important to mention that the Order Preview dialog will appear only if you activated the Preview the order selection for the When Placing an Order option in the Actions & Properties tab. You can choose from Upper-Left, Upper-Right, Bottom-Left, Bottom-Right and Center when you select the position of the preview dialog on your screen (the Place Order Preview on Screen in option). The other options will change the look of the Order Preview dialog. In order to read more about it, please click here. |
|
|
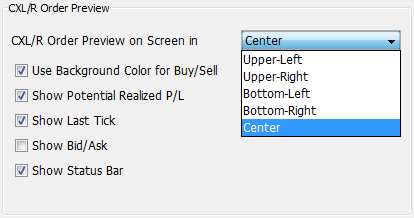
The Order Preview dialog looks a little bit different when you are placing an order versus when you cancel/replace one. Change the options in the CXL/R Order Preview section of this tab, in order to modify the position or the look of the Cancel/Replace Order Preview dialog. |
|
 Use this button to add a new account rule.
 Use this button to edit a previously created account rule.
 Use this button to delete an account rule. It is important to mention that the rule will be immediately deleted without any warning.
 Account Groups button from the