
|
|
The Application Toolbar is located at the top of the screen, above the Order Entry Bar and below the Main Menu (take a look at Application Layout). As explained in the linked page, please note that these bars may be hidden.
|
|

|
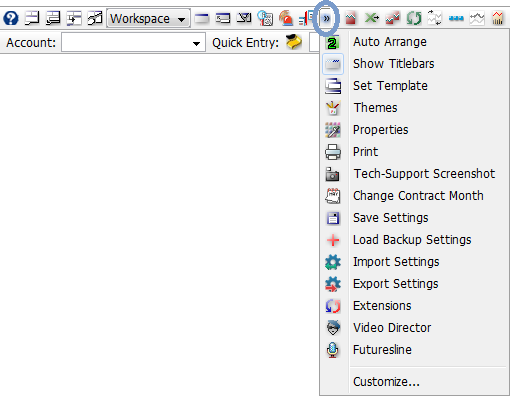
This toolbar can be used from all the frames of the application, it contains buttons with common actions. When you open a frame in the current workspace, you will observe that the selected frame's specific toolbar will be added to the right side of the one we describe here. The common and the frame-specific toolbars are delimited by a separator. It is also possible that your screen size doesn't accomodate all the icons belonging to the toolbars at the same time. In order to have access to the hidden icons, you just need to press the |
|
|
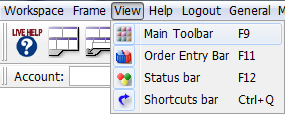
You can hide this toolbar, if you go to the main menu of the application, select View and unselect the Main Toolbar option or press F9. If you repeat this action, the toolbar will appear again. |
|
|
In order to customize the Application Toolbar you just need to:
|

|
|
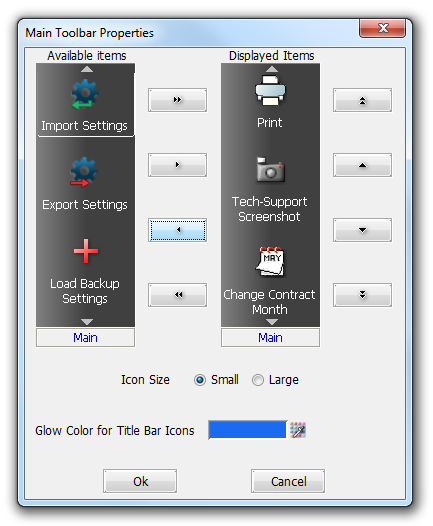
From the Main Toolbar Properties you can add, remove and reorder the displayed items of your Application Toolbar. You can also change the icons' size and glow color. By the Available Items' list right side (containing elements not shown on your toolbar) there are 4 buttons which enable you to:
By the Displayed Items' list right side there are 4 buttons that you can use to move the selected item:
In order to change the Icon Size, you should choose between Small and Large. If you want to modify the Glow Color for the icons, press the |
|


 button.
 add selected item
 remove selected item
 remove all items
 to top
 one position lower
 to bottom
 button and selecting the color of your choice.