 Templates
|
|
TemplatesYou can apply a template to your workspace when you create a new workspace, or by pressing F3. You can also press the Templates button from the Application Toolbar, in order to set a template to the current workspace.
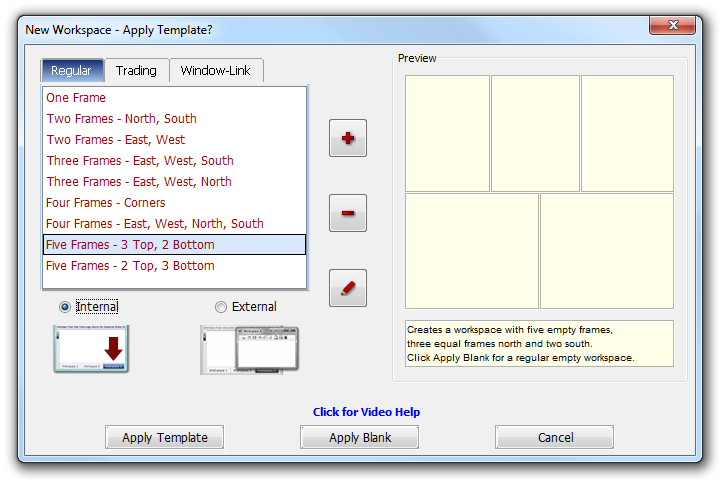
There are 3 kind of workspaces and we named the templates the same: Regular, Trading or Window-Link.
The Regular template defines the number of frames and their location and size in a workspace. If you create a new workspace using a template with 2 frames, the new workspace will contain 2 frames without content (that you will have to set later). The frames will keep the template's settings (location, size of frames). If, while using the application, you change at any moment the size of frames or their location and then press the Auto Arrange button, the frames will return to the template's settings. You can apply Regular templates to an existing workspace by selecting the workspace and pressing F3.
For a Trading template you can specify frame type (recommended). When you create a workspace with this template you have to provide a contract. All the frames will load their content based on this contract. If you change the name of the workspace to another contract, the new contract will be loaded for all the frames in the workspace.
The Window-Link template allows you "synchronize" the data displayed between various component frames; it allows you to establish a dataflow between certain frames, so that changes operated in a frame considered primary (such as browsing through the contracts that populate the rows of a Quotes Monitor) will be reflected in the secondary frame(s) (continuing the previous example, the Charts would react by updating to the currently focused contract in Quotes Monitor). For a more thorough description of this feature, please click here.
|
 Use this icon to add a new template.
 In order to remove an already selected template from the list, press this button. It is important to mention, that you can't remove the default templates, just those what were added by you.
 Press this button to rename a template what was previously created by you.
When you create a new workspace, you will be also asked if you want to create it as Internal or External. In order to read more about Workspaces, please click here.
Once you selected the template of your choice and are ready to use it, press the Apply Template button. In order to go back to the previous screen, without applying any template to your workspace, press Cancel. If you want to create an empty workspace, without applying any template, press the Apply Blank button.
