|
|
The Group Frames mechanism comes as a support for situations when the user would like to create links between internal frames of a regular workspace. Although similar to Linked Workspaces, it offers more flexibility.
|
|
When we are talking about the frame grouping mechanism, we can classify the frames of the application in three different classes:
Master frames will dictate the contract to be loaded in the other group's other (slave) frames.
Every master frame has an icon in its title bar that indicates the status of the frame (take a look at the images below). A frame that has an uncolored icon does not belong to any group.
 - unassigned master frame
 - master frame for the "yellow" group
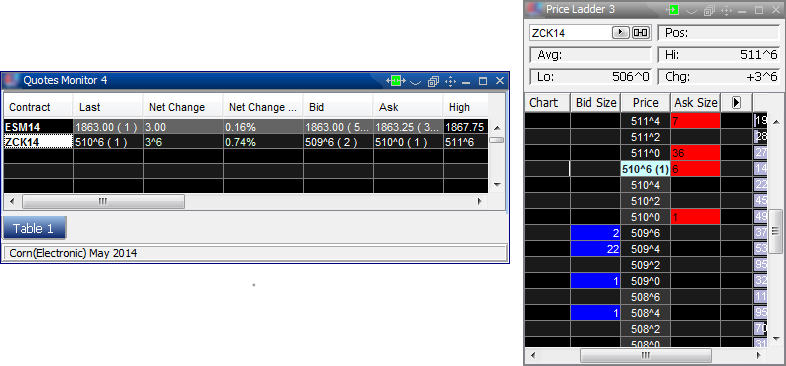
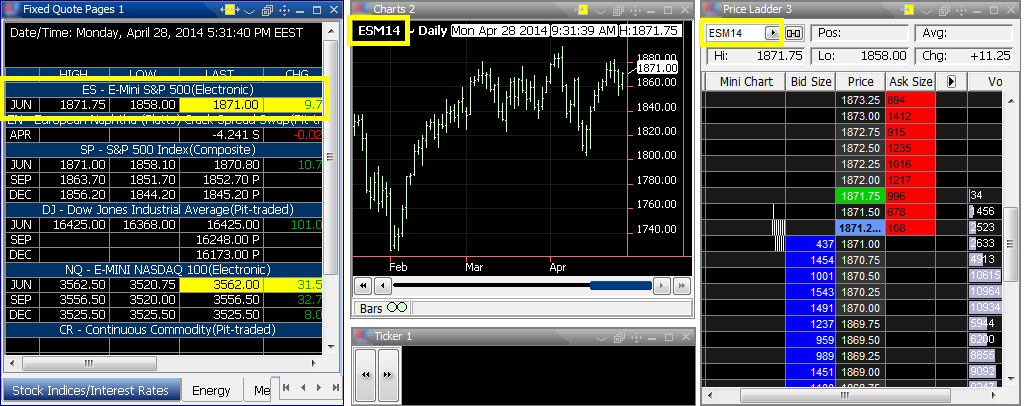
The available master frames of the application are the following: Quotes Monitor, Quote Board, Fixed Quote Pages, Data Pages and Spread Matrix.
Slave frames will load the contract dictated by the master frame.
These frames also have an icon that indicates if the current frame is a member in any group; if it is, the color of the icon will indicate the group it is part of.
 - unassigned slave frame
 - slave frame for the "blue" group
The slave frames that can be grouped with the master frames are: Charts, Point & Figure Charts, Spread Charts, Advanced Options, Options Chain, Price Ladder and Depth Of Market.
Neutral frames cannot be part of any group. These frames have no designated icon (besides the standard ones, of course). (In order to read about all the available frame icons/buttons, please click here).

Please take a look at the list of the application's neutral frames: Orders & Positions Monitor, Order Ticket, Account Information, Order Activity Log, Broker Workstation, Time & Sales, Options All Months, Snapshot Quote, News, Ticker, QST Weather, Trade Blotter, Show RFQ, Place RFQ, Block Trades, Futuresline, eINFOline and User Defined Strategies.

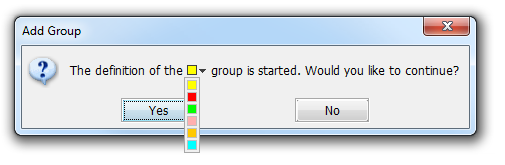
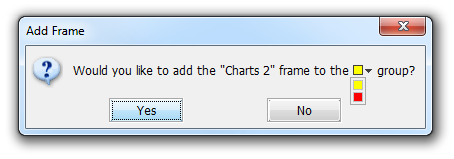
When an unassigned master frame icon (  ) is clicked, a dialog will be displayed informing you that the definition of a new group is being started. At this point you can choose to continue or cancel the process by clicking on the Yes or No buttons. At the same time you can select the color which will be associated with this new group. Canceling the process will end the group building, while pressing Yes will go to the next phase.
|
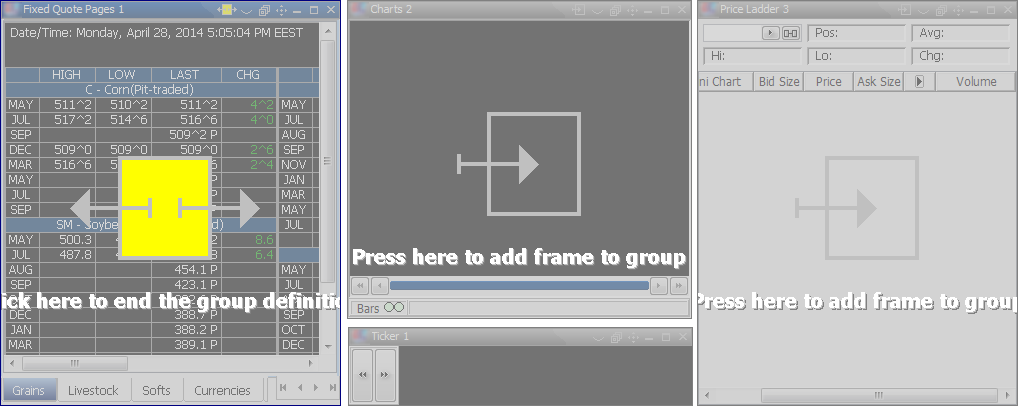
In the next step, all the frames that cannot be part of this new group will be grayed out: this includes the neutral frames, the other unassigned master frames or the already assigned slave frames.
The slave frames that may be assigned to the group will be covered with the following message: "Press here to add frame to group". The master frame will be covered by the "Click here to end the group definition" message.
|
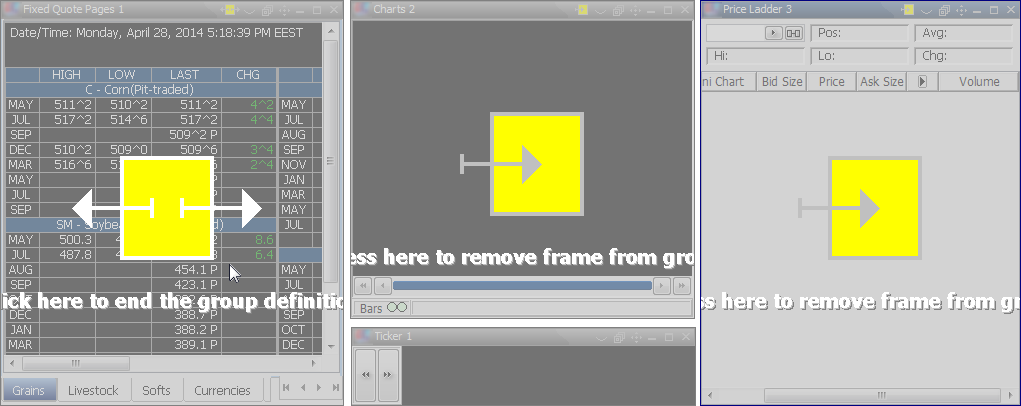
You should click anywhere in the available slave frames to add them to the group. If you change your mind, you just need to click on the slave frame again and remove it from the group. When you are ready with the group building process, just click the master frame and the group will be created.
|
After you finished the process, all the frames will be enabled again and the grouped frames will have the assigned master and slave icons (  ,
,  ) in their title bars.
|
When the icon of an unassigned slave frame (  ) is clicked, a confirmation dialog is displayed that asks: "Would you like to add x frame to the y group?". You will be able to select a group/color from a radio buttons list. Upon confirmation the frame is added to the selected group.
|
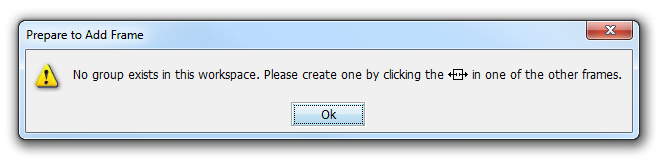
It is important to mention that this icon can be used only if a group has previously been created, otherwise you will get the following message:
|
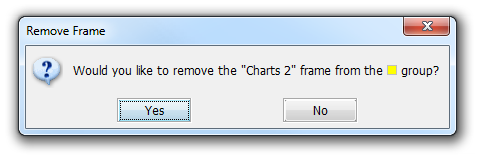
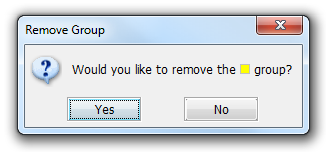
When the icon of an assigned slave frame ( ) is clicked, a dialog is displayed (please take a look at the image below). Upon confirmation the slave frame will be unassigned from the group and its icon will be updated to display this status ( ).
A frame is automatically unassigned from the group when it is closed or externalized. In order to read more about this, please take a look at the Frames Help page.
|
When the assigned icon of a master frame ( ) is clicked, the dialog from below is displayed. Upon confirmation all the frames will be unassigned from the group and their icons will be updated to display this status ( , ).
|